Showing posts with label stitching. Show all posts

Wednesday, October 25, 2017

Kuchi Koo Take Two - Stenciled Bracelet - for the Artist Tribe


Kuchi Koo Take Two!

The Artist Tribe is featuring Kuchi Patches from Gwen Lafleur's shop. I've already featured one, a small round one, in a fiber art brooch. (Interested? Click here.)

Look at this beauty! The color. The design. The geometry. I was smitten, but couldn't decide what
to do with it. 


That is until the day I looked up from what I was doing and saw this. The color of the Strathmore Printmaking paper cover was a perfect match. I had been saving it because, well, it's good paper and I keep such things to reuse. Also on my desk that day, was an empty cardboard roll which had been relieved of its duct tape. 

I cut the paper half an inch wider than the cardboard roll. You may want to leave 3/4 of an inch to make putting it together a little easier. 


Using a ruler, mark a quarter inch from the edge on the back side. Then using a paper punch for making tiny holes pierce the paper every quarter inch along the line. 


Now for the fun! 


I chose Gwen's stencil Art Deco Borders Stencil because I felt it would echo the angles of the kuchi patch. I lined the stencil up with the edge of the paper and applied black acrylic paint. This was where I had to make some additional design decisions. The paper was very porous and so I did not get a clean transfer. What I got was a lot of bleed. No matter, there are ways to address this. 

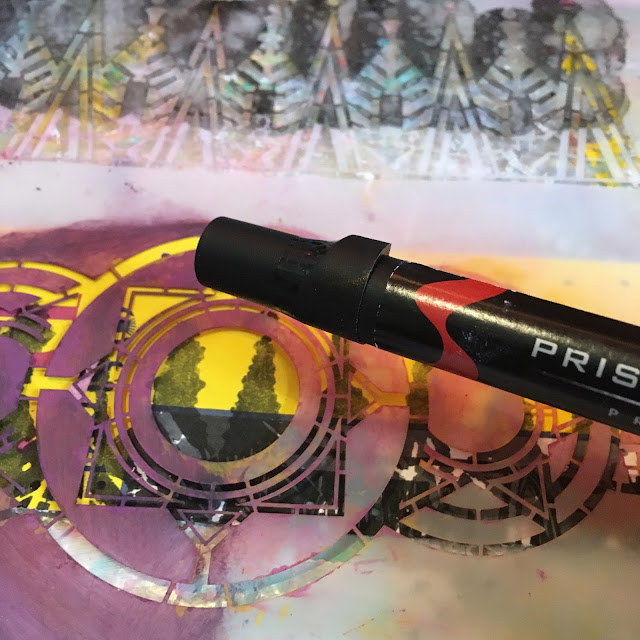
Next, I used the middle element and used a prismacolor marker that picked up some of the colors of the kuchi patch. 


The results looked like this. 


So far I was loving it but wanted more. Turning the paper over, I added the original stencil using black to the other side. I think you can see some of the bleed here. Next, I went in with gel pens in a contrasting color and went through the stencil again.


Here you can see the result of using the stencil in two different colors and styles and four colors of accent gel pen. 


Before attaching it to the cardboard, I checked the kuchi against the paper. When I was happy with the results I added a layer of gel medium to protect the paper. I cut a piece of felt for the interior of the circle, lined up the paper and the felt and sewed them in place using red embroidery floss using a blanket stitch. 


Remember the raffia I bought at the Bonzai supply store and used in my Welcome Wall Hanging? It was a perfect color to use on this project. Taking four strands, braid a long piece, tie off and sew to the edge of one side. Repeat for the other side. 


Here it is! I can't decide whether to trim back the raffia. What do you think? 


Top


Bottom

Products needed for this project:


Empty roll of Duct Tape
Cover from Strathmore paper or paper of your choice
Acrylic paint in colors that complement your Kuchi Patch
Gel pens 
Gel medium
Piece of felt
Embroidery floss
Raffia


Love those Kuchi Patches? There is still time to cash in on the sale. 


and Gwen's having a Birthday Sale! 
Check in on October 30 - 31. 


Wednesday, October 11, 2017

Kuchi Koo - Artist Tribe Challenge October 2017


One of the many fun things about being part of Gwen Lafleur's Artist Tribe is the monthly challenges. Gwen's shop is so jam-packed full of great stuff it's hard to choose what to work on. These challenges help me to focus. I'm liable to stop and chase shiny objects midway through a project, so this structure works well for me.

Well, it's not just great for me, but it's also great for people who have a bit of hesitation because they can't think of how to use a particular shiny item. Peruse the Tribe's offerings of the month and you will get inspiration and the itch to create. Like bonuses? (Who doesn't?) There's a discount coupon at the end of the post.

This month the challenge was to use her kuchis from Afganistan. Here is my project and some information about my process. I got so wrapped up in the process I forgot to take pictures at each step. 


Who wouldn't make the connection between this piece of silk that's been in my stash for near 10 years and this beautiful kuchi


This gold trim from the Irresistible India Happy Pack in Gwen's shop and I love the way it works with the gold thread.


Then there is this - beautiful sari yarn from Darn Good Yarn. 
The colors! So luscious! Knew that this sari yarn would have to be stitched around the edge of the kuchi. 


But before I used that great Twisted Sister sari yarn, I thought the green sari ribbon that was in my welcome pack would be a great background. A running stitch along the edge, a pulled to make a ruffle and roughly stitched to the back of the kuchi made for a strong base. 


Next, the Twisted Sister sari yarn was stitched into the green sari yarn along the edge of the kuchi. 

Later I found it disappeared into the fabric, so I ended up stitching it again to upper edge of the kuchi. It was much more visible this way. 


Next the gold trim was gathered and sewn to the green sari yarn.


Next I wrapped some of that Twisted Sister sari yarn around my hand and tacked it together with thread. By cutting the bottom I made tassels of sorts. 

Remember that silk fabric? I cut some and tied it in a knot at the end of each strand. Beads were added and the whole was stitched to the back of the kuchi. 


Cutting a strip of silk for one more round of ruffle made it very apparent that silk frays. A quick zigzag around the edge helped to stop the strands from flying away. Then the two edges were sewn together, drawn into a ruffle and sewn to the backside of the kuchi. 


Finally, a circle of felt was sewn to the back to cover all the stitching and errant threads and a pin backing was tacked in place. Viola! A pin to wear to cheer up dreary days. 

I hope I have tickled your fancy with my Kuchi-Koo. Find yourself thirsting for a kuchi? Well, my friend, you have come to the right place. Gwen is having a sale. 


Wednesday, August 30, 2017

Ornamental Petals Screen Embroidered Zipper Bag - Tutorial for Gwen Lafluer's Artist Tribe


I'm excited to introduce my first project for Gwen Lafluer's Artist Tribe. This is the first design team for me. Usually, I simply follow my instinct when creating. To be truthful, I did not do the steps in the most logical order, but I will walk you through my process. Feel free to adjust the steps.

The end result is a zippered pouch approximately 6" X 6.25". It is embellished with acrylic paint, embroidery and vintage buttons. The inspiration for this piece was Gwen's Ornamental Petals Screen stencil from her Ornamental collection produced by Stencil Girl. I love all the details. 


Recently I have been interested in adding more fabric into my artwork. The first piece I could find was a piece of pale, pink fabric covered with delicate roses. It was just the right size to print this luscious stencil


Printed twice, back to back, the piece was perfect to make a bag.  


At first, I thought it would be a drawstring bag, so I used artist tape to block off a space for the drawstring and added paint for a little extra. In the end, I decided it would be a zipper bag, so this part was trimmed off. 


Using the stencil as the pattern, the edges were embroidered using the backstitch in DMC floss 703.


While the green was taking shape, the circular patterns reminded me of vintage buttons I had in my button jars. The center buttons were a set of nine buttons that mimicked the decorative aspects of the stencil. Perfect! I needed eight buttons! I then decided to use a mix-matched set of smaller buttons. I found 32 buttons that were similar in style but added variety. 


Here is the full stretch with buttons attached. 


Taking a look at it, I determined that the details should be embroidered in a pale pink - DMC 618. The teardrop shapes were done in blanket stitch and lazy daisy stitch was used in the crevices. 


It was time to trim the edges and sew the piece into a bag! Hooray! Unfortunately, it was impossible to use my rotary cutter to trim up the edges. Having the buttons sewn on made the surface too unstable.  Using a quilting ruler and a fabric pencil I added a quarter inch mark on both sides and cut the line with sewing sheers. The top I left untrimmed until sewing the piece together.


Next came bias binding tape at the top. Once basted in place, the zipper was pinned on top. This zipper has been in my stash since 1970 so I am delighted that it found its way into a project at last. Look! It cost 45 cents. 


Once the zipper was secured, a chain stitch embroidered in green secure the layers together so they lay flatly.


Then sew up the sides for the finish! Wait a minute, how could we skimp on details? The zipper pull deserves a little love. So that ninth button in the set? Together with a mother of pearl button and a couple of large jump rings, this zipper pull is charming it!


Here's another view of the finished product!


For this first project, I used only one of the many wonderful materials that I received from Gwen. In the photo below you can see a hint of some of the materials that will show up in some of my future projects. I can't wait to show them all to you. 

Don't want to wait for me? I don't blame you. You can head over to her shop where she is having an end of the season sale going on. 

https://www.gwenlafleur.com/store/c3//mixed-media-supplies-kits