

If you have been following me for long you will already know that I am not prone to following the rules. At first, I thought traditionally about using Gwen's Christmas Collection stencils and you can see that I started off by printing out a copy for each of my party guests. (I'd like to mention that they all wanted to use the stencil themselves. It's important to mention we shared nicely, taking turns and saying please and thank you.) When starting to make my own project, however, I veered off in another direction.
I quickly realized that the stencil could be used to make the paper reflect any style. It really is that versatile. So I challenged myself to use those two stencils to create three distinct styles. Thinking about the hallmarks of each style and breaking down those elements will help you to use these stencils to get the effect you want.
For the purposes of this experiment, I went with classic gold and cream, shabby chic and boho bright. I chose to make the papers into triangle origami boxes. You know this is my go-to wrapping style. For each of them, I used paper ripped out of my sketchbook. The paper is cream colored. Each box requires 6 pieces - I made them in 5" and 6" squares. If you have read my origami boxes posts, you will know that I used to work for Japan Publications Trading Company as a copy editor and translator in their craft department. I favor the directions of Tomoko Fuse. You can choose any style of origami box - the more you make them the more you fall in love with them.
Stencils used for all three variations were Gwen's StencilGirl Stencils - Christmas Collection - Christmas and Cardinal and Holly Stencil & Christmas Poinsettia Stencil .
Classic Cream and Gold


materials
Sargent Art - Metalic Marker - Gold
Piece of gold star trim for accent


Apply pattern to the paper by tracing through the stencil with the marker. Fold box in the desired style. Add a gold accent. Viola! Classic gold and cream.
Shabby Chic


materials
Craft Smart acrylic paint in Sailing Sky, Vanilla and Rosy Posy
Ranger Liquid Pearls - White Opal
Piece of white lace
paper flower
Honesty time here. I was so focused on making the box that I forgot to take photographs of the paper after I stenciled it.
Paint the paper with a mixture of the blue and white paints and let dry. Pounce the pink through the stencil. Add liquid pearls to the area of the berries. Let the whole thing dry thoroughly before folding into boxes or the liquid pearls will smear.
Put the boxes together and get ready to embellish.
I had a scrap of by-the-yard lace fabric, but you could use lace trim. The lace was cut double wide and folded over to create more puff. Thread the needle and make a double knot. With edges together sew a running stitch along the raw edge. Gather and fan out to make a circular shape. Overlap so that the lace goes twice around. Pull the thread to size and knot. With the shape determined, sew through the layers to secure the spiral. Take the needle through the flower. Cut a piece of lace for the ribbons and cut the ends either at an angle or in an upside down v. Fold in half and bring the needle through the fold to secure to flower. Attach to box by carefully putting the needle through the hole between the pieces (if making a triangle box) or by making a stitch through the paper (if there is no hole.)
Isn't it sweet?
Boho Bright


materials Craft Smart acrylic paint in Plum, Wine, Bright Rose, Bright Magenta, Bright Yellow, and Red.
Dylusions Ink Spray - Tangerine Dream
Ranger Liquid Pearls - Gold Pearl
Irresistible India Mini Woodblock Border Stamps - Paisley 1
Piece of Sari Yarn from Darn Good Yarn - Twisted Sister
Gelli Plate
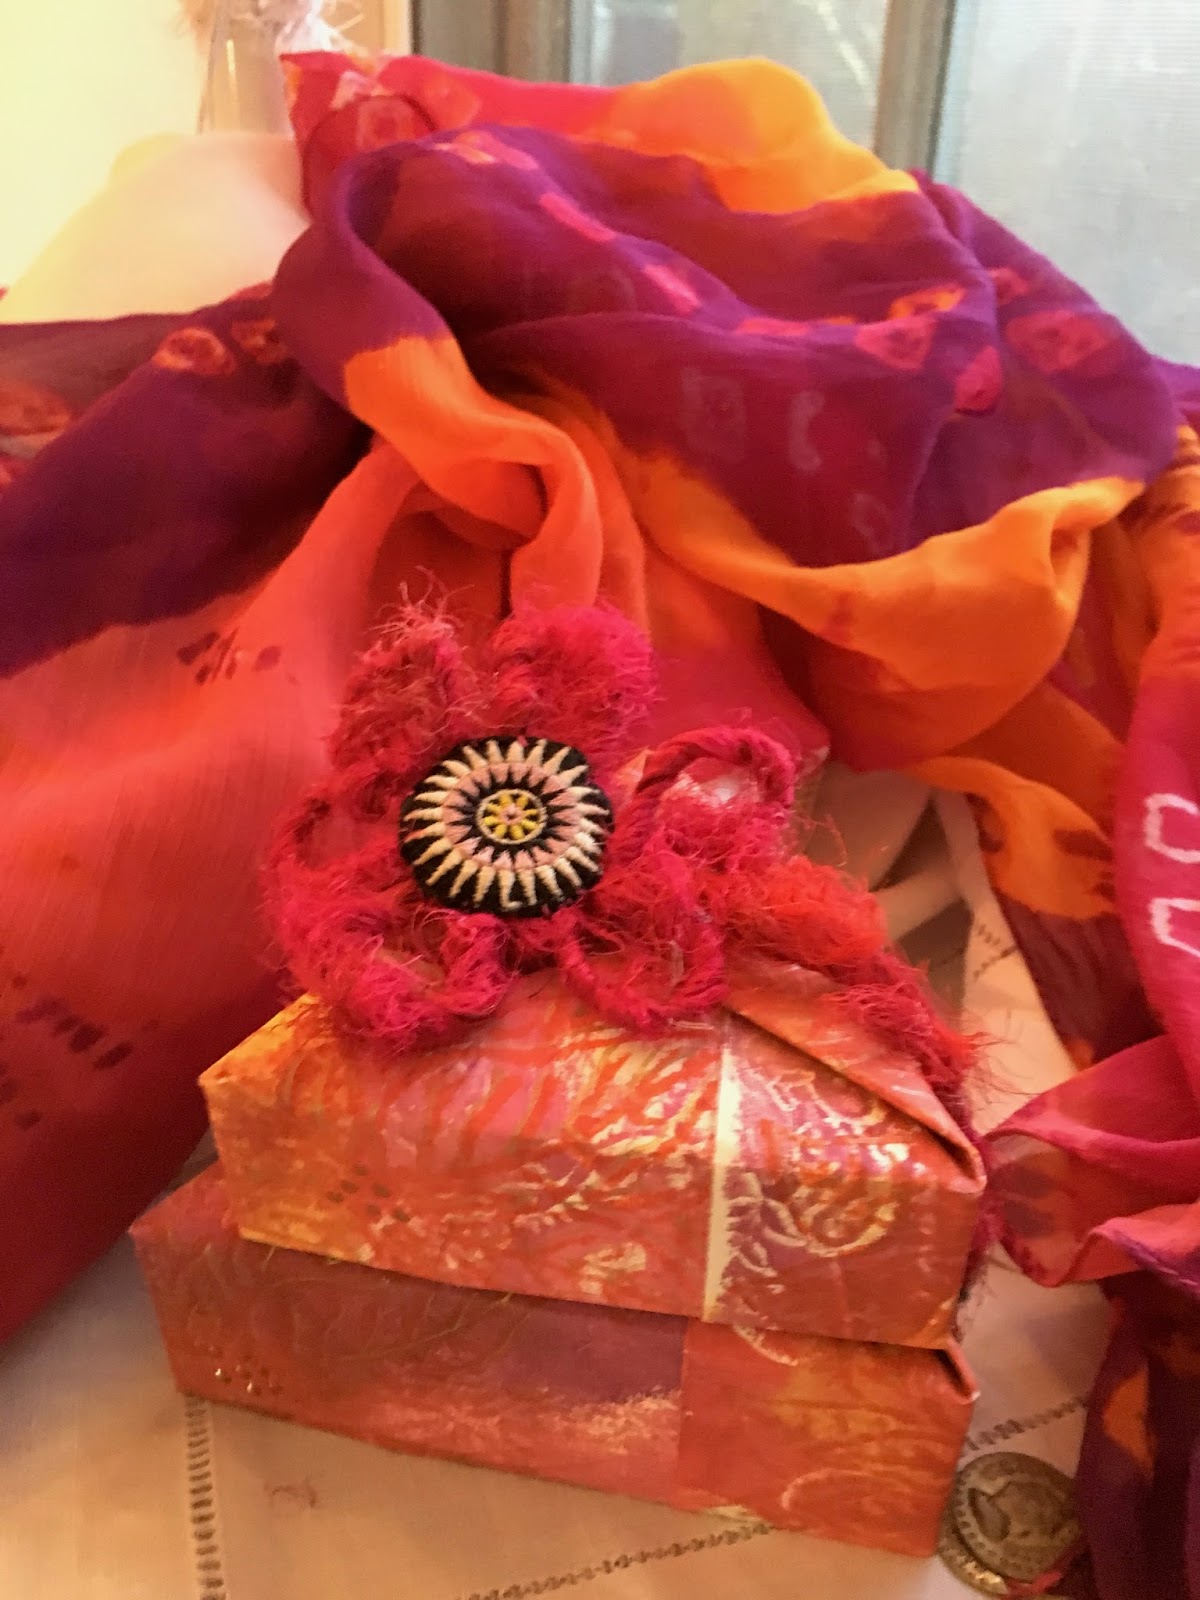
For the Boho version, I wanted a very layered paper. Out came the gelli plate and a bunch of woodblock stamps from Gwen's shop. The scarf you see in the pictures above was the inspiration for the colors. That's when I discovered that I don't have any strong orange paint. Gelli plates make it really easy to remedy that.

Each paper was printed many times, layering and layering the stamps and the colors. Some layers are hardly visible, but when tseen together it has a very bohemian, well-traveled feel to it.

When content that there were enough layers the stencil was applied using spray ink. Sadly, it bled. Guess I was a bit enthusiastic. This is mixed media, though, so easy enough to fix. A gold gel pen traced through the stencil put all to rights.
Add the liquid pearls in gold pearl to the berry areas. That really makes it pop.


Fold the pieces and put the box together.

Next, I took out the stitching that kept the embroidered star to the lovely velvet backing and liberated the star.

To make the tie to hold the boxes together I used sari yarn. Take a stitch at the end of the yarn. Wrap the yarn around your thumb to make a loop. Take a stitch through the bottom of the loop and the end of the yarn. Continue to make thumb-sized loops and secure to the middle using a stitch. When the motif is large enough stitch the embroidered star to the yarn. I put a loop on the back to pull the end through. This is then adjustable. It can secure the packages. It can also be used as an accessory. Two gifts in one!

So there you have it! Three distinct styles using just the two stencils. So many other possibilities await!
While I didn't use any Dresden or Scrap in this project (I thought I was still in November! How time flies!) it would be so easy to use it here. Use a gold medallion with the classic gold and white, scrap and medallions with the shabby chic and my, oh, my, the Dresden would look great with the boho look!
Stay tuned, because there will be no holding me back with the Dresden and scrap. Meanwhile, here is a discount code so you can get some supplies in time for holiday projects.
Gelli Plate
For the Boho version, I wanted a very layered paper. Out came the gelli plate and a bunch of woodblock stamps from Gwen's shop. The scarf you see in the pictures above was the inspiration for the colors. That's when I discovered that I don't have any strong orange paint. Gelli plates make it really easy to remedy that.

Each paper was printed many times, layering and layering the stamps and the colors. Some layers are hardly visible, but when tseen together it has a very bohemian, well-traveled feel to it.

When content that there were enough layers the stencil was applied using spray ink. Sadly, it bled. Guess I was a bit enthusiastic. This is mixed media, though, so easy enough to fix. A gold gel pen traced through the stencil put all to rights.
Add the liquid pearls in gold pearl to the berry areas. That really makes it pop.


Fold the pieces and put the box together.

Next, I took out the stitching that kept the embroidered star to the lovely velvet backing and liberated the star.

To make the tie to hold the boxes together I used sari yarn. Take a stitch at the end of the yarn. Wrap the yarn around your thumb to make a loop. Take a stitch through the bottom of the loop and the end of the yarn. Continue to make thumb-sized loops and secure to the middle using a stitch. When the motif is large enough stitch the embroidered star to the yarn. I put a loop on the back to pull the end through. This is then adjustable. It can secure the packages. It can also be used as an accessory. Two gifts in one!

So there you have it! Three distinct styles using just the two stencils. So many other possibilities await!
While I didn't use any Dresden or Scrap in this project (I thought I was still in November! How time flies!) it would be so easy to use it here. Use a gold medallion with the classic gold and white, scrap and medallions with the shabby chic and my, oh, my, the Dresden would look great with the boho look!
Stay tuned, because there will be no holding me back with the Dresden and scrap. Meanwhile, here is a discount code so you can get some supplies in time for holiday projects.


