Showing posts with label how-to. Show all posts

Wednesday, December 27, 2017

Bohemian Paper Vase


I've been taken with the beautiful paper vases that grace the origami scene for quite some time. While I admire that stark esthetic of rice paper and black or indigo ink, anyone who has been visiting this blog won't be surprised to know that I just couldn't follow the trend. Mine vase was going to be bright, bold and more than a little bit colorful. In fact, the vase would be used to hold some peacock feathers my friend gave me from her friend's peacocks. How could it be anything but bright?

Using Gwen's Decorative Medalion Stencil and a piece of patterned 12" X 12" scrapbook paper, stencil the image four times lining the stencil up with the edges.


Using another color, apply the stencil again in the middle. Add more pattern with an additional color by stenciling just the middle element in empty areas.


Once the paper is dry, fold it into the box shape of your choice. I used directions from a book I purchased in 1996 Kurashi ni Ikasu Kantan Origami 100 - Part 2. Yes, it is in Japanese. Directions for vases are plentiful in other books and on the internet. A quick google search just made my eyes go wide with the variety of options out there. 

Once folded, I chose four medallions from the Dresden Trim - small medallions  to adhere to each side. These medallions are beautiful and come in a variety of shapes. I chose four that had prominent points to keep it looking unified, though unique. The medallions were adhered with hot glue to each side making sure that the hangers were facing downwards. 

(Hint: Cutting the medallions apart and storing them in a small container, like the hard candy tin you can see in the background, makes it easy to use them.)


Some of Dresden borders were applied to the edge of two opposing sides. Liquid Pearls by Ranger were applied to the other two sides and around the medallions for accent. 

To each medallion beads of various colors were attached. The colors were selected from colors to match not only the vessel, but also the peacock feathers which would be arranged within. 


The paper vase is lightweight and easy to tip over, so filling it with some plastic beads gave it more stability. If you wish to add fresh flowers place a cup inside to hold the water. The peacock feathers were added, a bit of raffia tucked into the top and a bow was added. Let me just mention that this ribbon is one that Gwen wraps her packages in. Naturally, I save it to use and it perfectly suited my purpose here. 


Do you love that Dresden trim as much as I do? Gwen is having a sale, but hurry it's only until the end of the month. Here's a coupon code for you to use. 


Saturday, December 2, 2017

Making Holiday Gift Wrapping - Part Two - Holiday Stencils Three Ways


If you have been following me for long you will already know that I am not prone to following the rules. At first, I thought traditionally about using Gwen's Christmas Collection stencils and you can see that I started off by printing out a copy for each of my party guests. (I'd like to mention that they all wanted to use the stencil themselves. It's important to mention we shared nicely, taking turns and saying please and thank you.) When starting to make my own project, however,  I veered off in another direction. 

I quickly realized that the stencil could be used to make the paper reflect any style. It really is that versatile. So I challenged myself to use those two stencils to create three distinct styles. Thinking about the hallmarks of each style and breaking down those elements will help you to use these stencils to get the effect you want. 

For the purposes of this experiment, I went with classic gold and cream, shabby chic and boho bright. I chose to make the papers into triangle origami boxes. You know this is my go-to wrapping style. For each of them, I used paper ripped out of my sketchbook. The paper is cream colored. Each box requires 6 pieces - I made them in 5" and 6" squares. If you have read my origami boxes posts, you will know that I used to work for Japan Publications Trading Company as a copy editor and translator in their craft department. I favor the directions of Tomoko Fuse. You can choose any style of origami box - the more you make them the more you fall in love with them.

Stencils used for all three variations were Gwen's StencilGirl Stencils - Christmas Collection - Christmas and Cardinal and Holly Stencil & Christmas Poinsettia Stencil .


Classic Cream and Gold


materials
Sargent Art - Metalic Marker - Gold

Piece of gold star trim for accent


Apply pattern to the paper by tracing through the stencil with the marker. Fold box in the desired style. Add a gold accent. Viola! Classic gold and cream. 

Shabby Chic


materials
Craft Smart acrylic paint in Sailing Sky, Vanilla and Rosy Posy
Ranger Liquid Pearls - White Opal
Piece of white lace 
paper flower

Honesty time here. I was so focused on making the box that I forgot to take photographs of the paper after I stenciled it. 

Paint the paper with a mixture of the blue and white paints and let dry. Pounce the pink through the stencil. Add liquid pearls to the area of the berries. Let the whole thing dry thoroughly before folding into boxes or the liquid pearls will smear. 

Put the boxes together and get ready to embellish. 

I had a scrap of by-the-yard lace fabric, but you could use lace trim. The lace was cut double wide and folded over to create more puff. Thread the needle and make a double knot. With edges together sew a running stitch along the raw edge. Gather and fan out to make a circular shape. Overlap so that the lace goes twice around. Pull the thread to size and knot. With the shape determined, sew through the layers to secure the spiral. Take the needle through the flower. Cut a piece of lace for the ribbons and cut the ends either at an angle or in an upside down v. Fold in half and bring the needle through the fold to secure to flower. Attach to box by carefully putting the needle through the hole between the pieces (if making a triangle box) or by making a stitch through the paper (if there is no hole.)

Isn't it sweet?

Boho Bright


materials Craft Smart acrylic paint in Plum, Wine, Bright Rose, Bright Magenta, Bright Yellow, and Red.
Dylusions Ink Spray - Tangerine Dream
Ranger Liquid Pearls - Gold Pearl

Irresistible India Mini Woodblock Border Stamps - Paisley 1

Piece of Sari Yarn from Darn Good Yarn - Twisted Sister

Gelli Plate

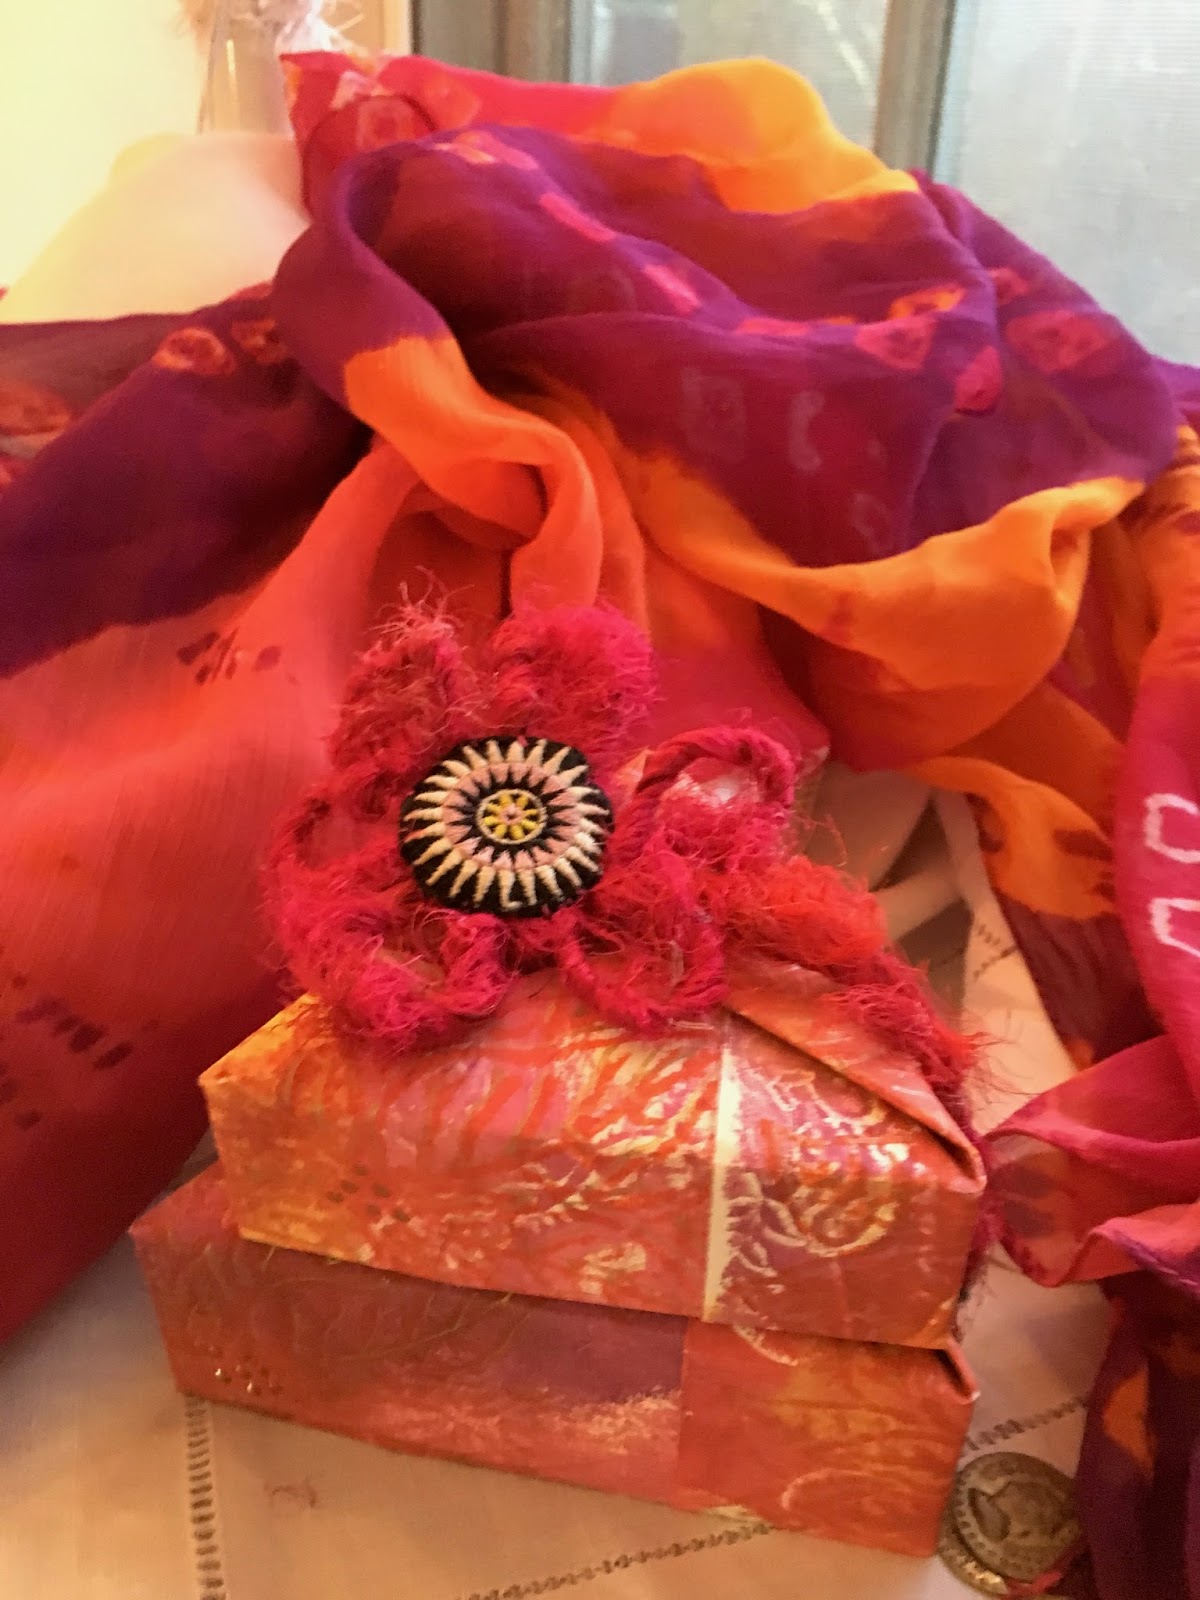
For the Boho version, I wanted a very layered paper. Out came the gelli plate and a bunch of woodblock stamps from Gwen's shop. The scarf you see in the pictures above was the inspiration for the colors. That's when I discovered that I don't have any strong orange paint. Gelli plates make it really easy to remedy that. 


Each paper was printed many times, layering and layering the stamps and the colors. Some layers are hardly visible, but when tseen together it has a very bohemian, well-traveled feel to it.


When content that there were enough layers the stencil was applied using spray ink. Sadly, it bled. Guess I was a bit enthusiastic. This is mixed media, though, so easy enough to fix. A gold gel pen traced through the stencil put all to rights. 

Add the liquid pearls in gold pearl to the berry areas. That really makes it pop. 


Fold the pieces and put the box together. 


Next, I took out the stitching that kept the embroidered star to the lovely velvet backing and liberated the star. 


To make the tie to hold the boxes together I used sari yarn. Take a stitch at the end of the yarn. Wrap the yarn around your thumb to make a loop. Take a stitch through the bottom of the loop and the end of the yarn. Continue to make thumb-sized loops and secure to the middle using a stitch. When the motif is large enough stitch the embroidered star to the yarn. I put a loop on the back to pull the end through. This is then adjustable. It can secure the packages. It can also be used as an accessory. Two gifts in one! 


So there you have it! Three distinct styles using just the two stencils. So many other possibilities await! 

While I didn't use any Dresden or Scrap in this project (I thought I was still in November! How time flies!) it would be so easy to use it here. Use a gold medallion with the classic gold and white, scrap and medallions with the shabby chic and my, oh, my, the Dresden would look great with the boho look! 

Stay tuned, because there will be no holding me back with the Dresden and scrap. Meanwhile, here is a discount code so you can get some supplies in time for holiday projects. 


Sunday, November 19, 2017

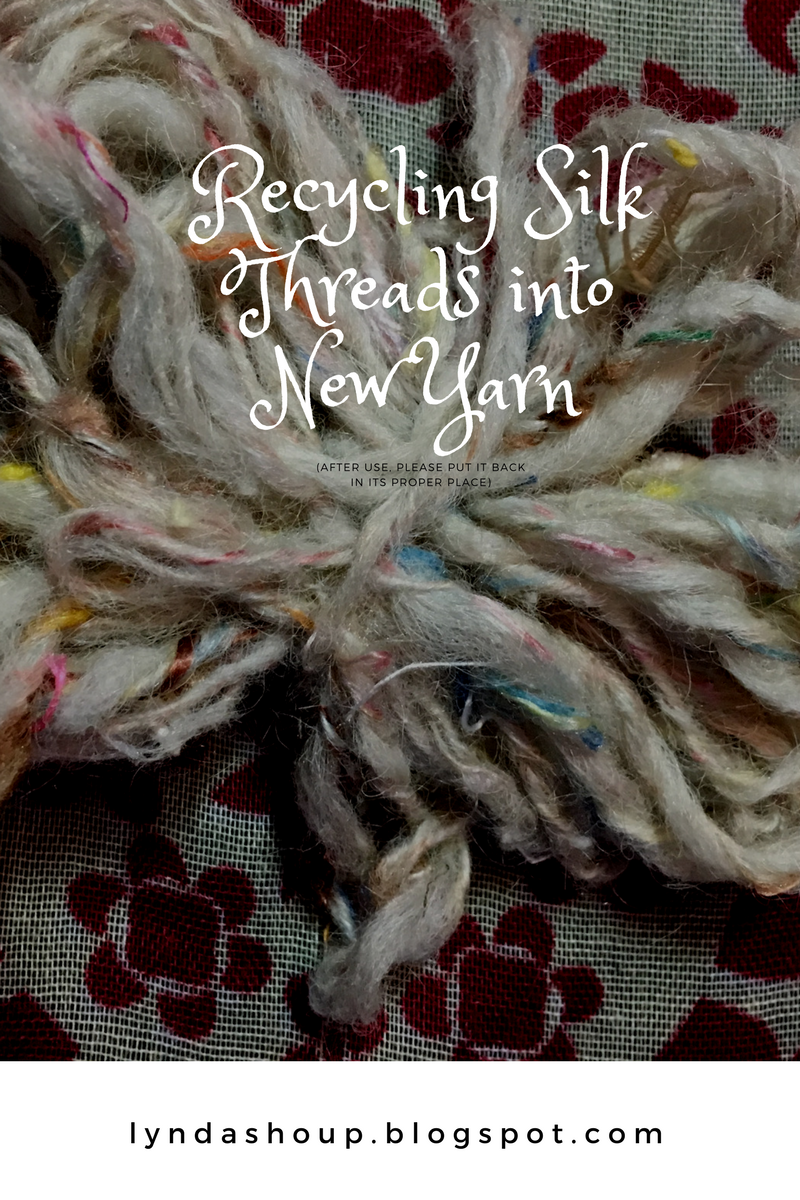
Recycling Silk Threads into New Yarn


I'm wondering if this should be the first in a series of posts about how I recycle things most people would throw away. I mean, you probably would. Me? I just can't let go of certain kinds of materials. 

Point in case - these silk threads. 


I have been saving them for years. At first, I saved them because I was making paper. These threads added to paper pulp make an extraordinary paper. Simply lovely. So I had a little, zippered lunch bag that I saved them in. Now, these threads are the ones that fray off a piece of silk. Silk, that wonderous fabric! How could I let such fiber and color go? And, let's face it, silk frays around the edges like a grad school hopeful that needs those 5 more points on the GREs. There's plenty of this kind of fray if one works with silk. 

So a kind of synchronicity of events lead to the discovery of my wool carders, the silk, an old ball of yarn I spun years ago from natural wool and a wandering mind. It culminated with the box the carders was in fell off a pile, onto the floor and cracked open before my eyes. If that wasn't a sign that I should try them out again, I don't know what is. (So let it be known that I will accept any excuse to spend my time creating. I can tell quite a story, too.)

So here's how that beautiful silk looks when combed out. I added wool, and lots of it, so that there would be something to bind it together. I found that the parts where the silk ratio was too high, the whole thing fell apart. You have to have enough wool to hold it together. 


Here's the drop spindle I used to spin the yarn. I made the bottom out of fimo more than ten years ago. The dragonfly pattern in it was created by referencing a book about making colorful rolled sushi. Haven't touched this in years either, but worked like a charm. 


And here is the finished product. There is not much of it...yet. 


What I have found out is that it is possible. It works and this is something I can incorporate into my work. 


I didn't really have to spin it. I could have carded it and then used it for felting. Perhaps an easier way to make use of the materials. My mind doesn't rest. What about spinning scraps of paper into the yarn? Especially some of that beautiful stuff I get from Gwen Lafleur. I can never bear to throw away even a scrap of that stuff. 

So what say you? Does this sound like something you would do? Are you shaking your head and thinking I had better just go buy some new yarn? Like recycling? Would you like to see more articles like this? 

Thursday, July 27, 2017

Using Literary Genres in Thematic Writing about Art


This piece was done as part of a biographical study. The image is based on a detail found in a painting of Marie de Rabutin-Chantal the Marquise de Sevigne.


Another way to approach writing about your art is to address the themes you deal with. Frankly, this aspect is more difficult for me. This is where I have trouble setting limits.  

Scanning instagram I see that there are people who make art about social issues, family, humor, lampooning, and meta art making - making art about art. 

I’m going to borrow the genres of literature as a springboard for thinking about themes. Think about the genre and how it may apply to you. It may not apply to your body of work, but feel free to use it when writing descriptions for individual pieces. 

Fiction

Adventure - this genre features people who, willingly or not, face extreme physical challenges that often are life or death deciding. Does your art inspire daring?

Fable - a tale which ends in a moral often involving talking animals. Does your art tell a story that is meant to impart a message? Is there a way in which you use the fable model in your artwork?

Fairy tale - Fairytales and folklore are close cousins. Fairytales are based in Europe, have royalty, a magical creature or thing, a problem and a magical solution. Many have a happy ending. Does this describe your art? Your take on life? What you want to portray to the world? 

Fantasy - The genre of fantasy covers anything from unicorns to talking bears. Imagine how this might apply to your work. Whimsical is a word that works well along with this genre. 

Folklore - This type of tale is one that is a traditional tale, passed down by word of mouth, and is commonly known among people. 

Historical fiction - deals with events of the past. It is storytelling that uses the framework of a particular historical period to inform the whole. Love vintage? Telling stories with vintage materials? Could this be your genre? 

Horror - Too scary for me, but perhaps you like being terrified and having your hair stand on end.  Does your work deal with the seedy, horrific or pathological? I hope not, but if so this might be your genre. Or you might just be creating political satire. 

Humor - Everything from joke books to hilarious memoir this genre sees the light side to events. Quirky, erudite, clever or restrained this genre brings a smile to your face. Does your artwork do that? Do you do satire? Play on words? See the funny side of things? Does the irony of a situation make you burst into giggles? This might be a genre for you. 

Mystery - this can be crime and grit or Agatha Christie, but it could also encompass the unsolved mysteries of the world or the things that seem out of our control. 

Poetry - uses rhyming, text structure, or other constructs to create an emotional response to the world. Does that sound familiar to you? 

Realistic fiction - This is the genre that could be things that have happened, but they haven’t. They were made up. I’ll bet a lot of us could use this genre to describe at least some of our work. 

Romance - need I say more?

Science fiction - this genre uses applies possible scientific theory to storytelling. This seems like a genre rife for collage artists, among others. 

Sports stories - Does your work revolve around sports? This might be for you. 

Tall Tale - These tales often start with a grain of truth, but the story takes on a life of it’s own. The fisherman who catches a 6 inch fish that turns into a 3 foot long devil of a fish with horns. Does your work stretch the boundaries of reality? This might be a hint for you. 

Nonfiction

Biography/Autobiography/ Memoir - a recounting of the events of a person’s life experience. While most art can be said to be biographical to some extent, some falls clearly in the realm of memoir. Make use of the construct when talking about your art. 

Drama - all the world’s a stage. This genre is all about what to do on that stage. Standing front and center. Claim it.

Essay - is meant to put forth an opinion and sway the reader to adopt this point of view. Perhaps your artwork is a visual essay. 

What do you think? Can any of these genres help you frame your artwork? Can they inspire vocabulary to use when describing your work? 


If you feel that this is helpful and would like to see a post with lists of words typically associated with these genres leave a comment to let me know. 

Wednesday, July 19, 2017

Fear of Commitment in Writing about Your Art

Shoup, Lynda Diane. Work in Progress. 2017, Private Collection of the Artist.


As I look through artists’ statements, look at their websites and Instagram feeds, I notice that professional artists specialize. Strong writers are specific and let you know exactly what you are going to get from them. Those of us who are late to the party, those of us who are heeding our artist’s calling later in life after doing other things, those of us who want it all, well, we have a hard time being that specific.

Let’s face it, we see specificity as limiting. We don’t want to be put into boxes. We want to be free to create whatever we want to with no holds barred. Listen, we’ve put our art on hold for more practical matters, art has been the joy in our lives. We don’t want to put a damper on it or demand things from it. It might stop being fun. 

But limits can be freeing. 

Shoup, Lynda Diane. Work in Progress. 2017, Private Collection of the Artist.
Limits allow us to say no to things. Limits allow us to focus. Self-imposed limits are wonderful because we can use them as our road map, but when it’s time to change direction, we can. Maybe you still want to make many things. Maybe you want to create as the spirit moves you. That’s great, but what do all the things you create have in common? What is your common thread?

The artist’s statement can and actually should, be revisited, reviewed and rehashed from time to time. Yes, we evolve and grow as artists. No, we are not going to remain static unchanging, art machines. Change is inevitable. So allow yourself to commit, for now, to focus. Or at least find some commonality that brings a sense of cohesiveness to your work. 


Shoup, Lynda Diane. Work in Progress. 2017, Private Collection of the Artist.
What is your reaction to these ponderings? Have you found this to be true? 

Monday, July 10, 2017

Documenting Artwork and Inventory Links

Post number four in this series. 

Learning about documenting artwork and applying what I learn to my own art continues. As I move forward with this it seems to me that providing links to the articles I find most helpful and reflecting upon that will be more helpful to others than me reinventing the wheel. It is also apparent that this series is better spaced out further. (The actual documentation takes time. More time than one would think.) So from here on out the Documenting Your Artwork series will post on the first Monday of the month. The Writing About Your Art series will remain the same.

Today's great find is GYST (Get Your Sh*t Together), a wonderful resource for artists about the business of art. While there are plenty of fine articles, the two that stand out as most pertinent for documenting your artwork are:

Documentation
https://www.gyst-ink.com/documentation/

and

Artwork Inventory
https://www.gyst-ink.com/artwork-inventory/


The Documentation article has plenty of good information about the visual documenting of artwork. This is particularly helpful to those who are planning to apply for publication, exhibitions, etc. I found the additional tips section had plenty to think about.

As a mixed media artist, I took note that labeling my work simply as mixed media is not very helpful for documenting purposes.

My big take away?

Document very soon after creating your piece. My latest piece includes a strip of plastic that came from the soba noodles I cooked for dinner one night, but it looks like washi tape. The likelihood that I will remember that in years to come is... questionable. The piece I finished the day before yesterday is still fresh enough in my memory that I can jot down the full list of materials.

Here's a picture of a fraction of the items I might use in a piece:
A fraction of the items I might use in a mixed media piece. 

What you see here is gelli print on deli paper, caught color on a piece of packing paper from a fragile purchase, stamps on tissue paper, a yellow, paper crown rescued from a cracker imported from England, a fortune cookie fortune, a prismacolor marker, a Stabilo pencil, two Sakura gel pens, a homemade stencil made from a pasta box, acrylic paint, liquid pearls, washi tape, embroidery floss, lace dyed with ink, and a Stays On stamp pad. 

Do you see how it would be hard to remember all of that later? 

As for the Artwork Inventory article, there's a lot of good information for me to chew on. Honestly, they got me in the first paragraph.  

Inventory number. As a librarian I have been used to ISBN (International Standard Book Number) numbers, Library of Congress numbers, barcodes and call numbers. So many numbers. So many ways to keep track of information, index it, retrieve it, sort it, and sometimes simply play with it. I've also been used to keeping data, tracking circulation, numbers of patrons checking in, checking out, renewing, over dues, collection age, collection value, collection circulation, etc. I am used to keeping this kind of information. 

And yet it never occurred to me to give my work an inventory number, much less assign numbers which would provide information. This is another task for me to consider and employ. Watch that google doc I posted, it just might have a few additions. 

Let me know what you think of these articles and the ideas. Were they helpful to you? Was any of the information new to you?