Showing posts with label books. Show all posts

Wednesday, January 24, 2018

Friendship Book


This friendship book is something that I have needed for a long time but didn't know it. It will be a place that will keep the many treasured tags, ATCs, notes, index cards, words of encouragement collected from, you guessed it, friends. Like an autograph book for the internet age. 

This project has come together by accident. Can't deny it. So I'll let you in on how it came to be. 


It started with this idea that I would make some Moravian Stars from stenciled paper for my post in December. ( I used the Decorative 6-petal screen stencil.) Sounded good to me, but I hit some technical difficulties - The paper I stenciled upon was not the right weight and consistency for paper folding...in fact, it ripped quite often. Meanwhile another idea was brewing. The idea was released.

Still, I had all of these lovely strips of paper covered with stenciling. A good housekeeper would have thrown them out. Perhaps I should have. Just to keep those hoarding tendencies at bay. But I didn't. 


I played with them. They sat on my desk for a few weeks. I curled some with the blade of a pair of scissors. That was fun (and I did eventually discard those pieces). I wove them. Well, that was mega fun. Trying to decide which strips should go next to each other was just the sort of thing I love. 


But that wasn't enough. There was this translucent paper stenciled with the Ornamental Petals Screen Stencil. After tucking the ends under and feeding them through loops in the back, the translucent paper went over the top. 


This Dresden Trim Medallion from Gwen's Small Medallions matched the pattern so well. It was cut into elements that were affixed to the middle and the four corners. 


Glass beads were sewn around the edge to secure all the papers and then along the edge of the stenciled area to enhance the design. 


I loved the piece. It stayed on the bulletin board waiting for an opportunity. 

Meanwhile, the Artist Tribe sisters were all talking about embossing powder. I had never used it. By chance, I inherited a selection of said items from my sister for Christmas. An old gelli plate print from several years ago was the substrate for my first foray in embossing. Wow! That stuff is amazing. (I used Gwen's Decorative Folk Flower Stencil 4 X 4). So that hung on the bulletin board next to the woven piece. 


Christmas also brought cheer in the form of a gift of a handmade book made by Gwen. It is absolutely beautiful. The cover was plain brown board, which it must be said looked amazing as is. However, it was also an invitation for embellishment. And embellishment it got. 


For the front cover:


1. A piece of sari fabric scrap from the Irresistible India - Embellished Sari Scraps was perfect for the cover. Cut a little larger than the cover, it adhered with gel medium, the edges flipped over and smoothed on the inside. 


2. The Mirrored Gold Embellished Trim adhered to the left side. The woven paper piece was attached to the middle. 
3. Flipping it to the inside, the fabric edges were cleaned up and covered with two types of Dresden Trim


Back cover:

1. The remaining scrap was not large enough to simply paste and go. It was cut into strips and adhered to the edges.


2.  The gelli print embossed with Decorative Folk Flower Stencil 4 X 4 paper was added. 
3. The Mirrored Gold Embellished Trim adhered to the right side with gel medium.
4. A piece of Dresden Small Medallions was chosen for the way it reflected the stencil design. 
5. Gold Liquid Pearls (Ranger) were used to embellish both the Dresden and around the paper. 
6. Silver glitter letters were added to read "Friendship Book." 
7. A piece of washi tape was added to the left side for interest.
8. Inside the cover, the washi tape and two types of Dresden trim to finish the edges. 


Spine:

A piece of Sari Yarn (Twisted Sister variety) was added to the spine. The color was chosen to complement the colors in the weaving. 

The jury is out on whether there will be more dangling elements hanging from the spine.  

Now that I have made the Friendship Book, the fun begins! Here's to filling up those pages. 

Friday, November 3, 2017

Secret Journey Journal and Some Beautiful Trim


What happens when you find an old map that your brother wrapped your Christmas gift in, you are thinking about what to make for the next Artist Tribe project and The Police are singing about Spirits in the Material World and their Secret Journey in the background?

Well, this. This happens. 

Naturally. 

What else could possibly have happened? Please don't answer that question. 

So I got this idea for a map of my spiritual journey. So many spiritual artifacts are ensconced in precious boxes covered with beautiful design. I had just the thing. My old iPhone box. I can never throw them away as they are so well made. I found the bottom right away. It took weeks for me to find the top, but that is another story....

So the map was cut into pages the size that could fit in the box. 


 Gwen Lafleur's compass stencil was the obvious choice for this project. I wanted to use a color close to indigo, but alas, in my enthusiasm for pink I have neglected variations of blue. What I had, I didn't have much of. I decided to mix it with black. It actually looks like I used black, but I am happy with the way it came out. 


While pouncing the color onto the page I became transported by memories and stopped paying close attention to what I was doing. The images are not crystal clear as one might imagine, but I decided that gave it a weathered effect that was perfect for this project and moved on. 


Usually, I use a slightly harder cardboard for the cover, but I decided to actually cover the cover. For this I chose a stunning paper from Gwen's collection. I thought the black and gold suited the project perfectly. The cover cardboard was cut to the exact size of the papers, the cover 1/4 inch larger on all sides. 


Adhere the cardboard to the paper. I used gel medium. 


Trim the corners. 


 Glue them down. 


For the interior cover (also called endpapers for those in the know) I used this beautiful peacock print paper also from Gwen's shop. It looks so regal. 


Before I bound the book, I cut a piece of Dresden trim and adhered to the cover using gel medium. Lucky me, the Dresden trim was the exact size to get both front and back pieces from. 

I bound the book using the Coptic Stitch. If you are unfamiliar with the process I would recommend watching a tutorial or two on YouTube. It does take some attention, but is fairly easy to do and looks great. 


Once the book was bound, I added bits and pieces of print in different languages - Chinese that came from Gwen's shop, Japanese and Russian from an instagram friend, French from a biography about the Marquese d' Sevenge who I was researching last spring, some Italian in the hand of Leonardo D'Vinci (though I have seen it written that he wrote backwards and is suspected to have dyslexia) and Korean (some word from a favorite KPop band, Shinee.) These all reflect travels of mine, with the exception of the Russian and that simply reflects friendship.


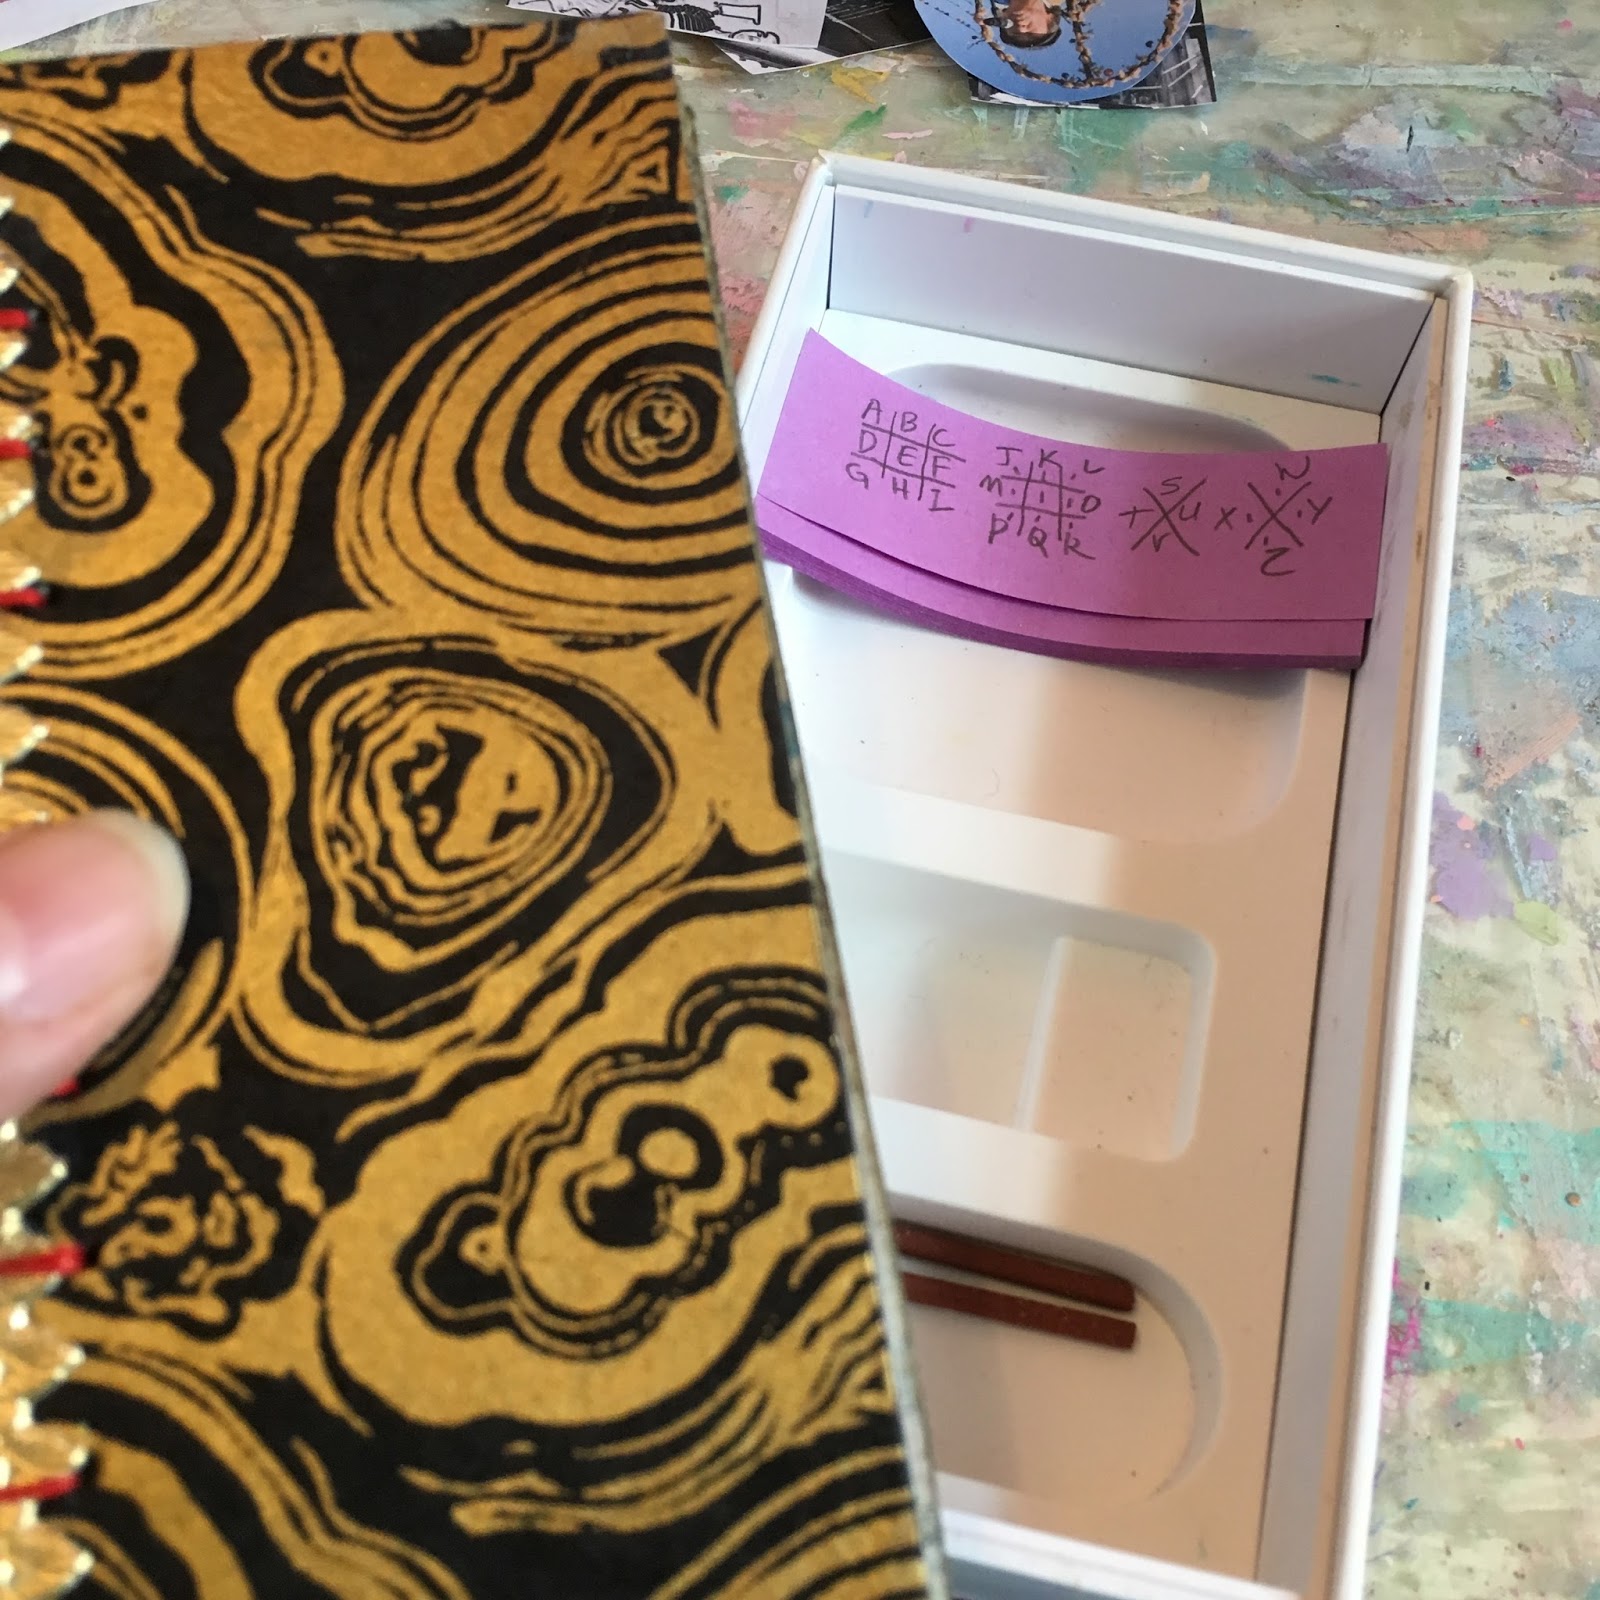
If I hadn't already decided to make it difficult enough, I chose to do all the text in code. I love a good puzzle. I used the code pig pen if you care to have a go at it. 

I carefully assigned meaning to each page spread and made a guide to help me keep on track. I then went through buckets of old pictures, scanning them, resizing them and using an app to make them all black and white. Some looked great when outlined or cartoonized, others were better with simple black and white. I printed them out like contact paper, cut them out and adhered them to the appropriate pages. 


Thanks to Artist Tribe member Jill McDowell, for inspiring me to see things within the stencils. I found visual hints on each page to keep the meaning coming. 


Let me be real here, a book like this isn't done quickly. It's really introspective, so I decided to begin and allow myself to continue as I go. Maybe you will see the completion post someday.

A beautiful book deserves a beautiful box, nes pa? Here's how I turned my iPhone box into a treasure box. 

Gwen sent me this beautiful piece of sari material. These will be available in her shop before long, so make sure you check in. I love this piece and it was precisely the size I needed to cover the lid! 


After folding the material over the box to make sure it would fit I added gel medium to the lid and pressed it on the fabric along one of the lines. Next, I adhered the long edges. Trim the excess on the ends and stick the sides down.  


Silk is lovely, but it frays in an ecstatic, energetic sort of way. I added gell medium around the edges to make sure they did not fray. 


Let's talk about Gwen's trim for a minute. This stuff makes you drool. With so much trim to choose from how does one begin? My box side is 2" high, so I chose a trim that is 1.5" and it works perfectly. I'm guessing that will help you narrow your choices down a little bit. 

I gave a liberal coat of gel medium on the backside of the trim and carefully adhered it to the box. Clothespins placed at the corners helped to keep it secure while drying. 


So here is the rub. Iphone boxes are snug. Really snug. So I couldn't get into the box very well once I had covered it. No problem, I wanted to do something to the bottom anyway. I glued a piece of the fabric I used in my Kuchi patch brooch to the bottom of the box. 

Then I used hot glue to add sari yarn around the edge of the box. This provides a place to grip and also keeps the box from closing completely. As you can see a piece of sari yarn is used to tie the box to complete the look. 


I just don't know when to leave good enough alone. I wanted to create a secret compartment for my box. I traced the inside of the iPhone tray and cut out a piece of craft foam that size. 


I covered it in the same fabric as the bottom and then attached sari yarn all the way around. Using a button making kit from a sewing supply store, I covered a button with the last scraps of that beautiful sari scrap and sewed it to the middle of the cushion. 


Placing a gemstone bracelet there makes it look like there is nothing else to be seen here. Well, let me dream that is what it looks like. 


The reveal.


The holes in the bottom of the box are wonderful for hiding things. Currently, I have the pig pen code. No, I haven't memorized it. I also have a stick of Japanese amber incense which makes the whole thing smell lovely. I am sensitive to scent and have trouble with most incense due to an allergy to jasmine, but this works for me. You could use a drop of essential oil, some lavendar flowers or a piece of your favorite soap. 


I'm sure to add more to this "secret" compartment, but I'm not going to share that with you. After all, it's a secret! 

Be sure to check out the materials I used from Gwen's shop:

Gwen's Stencil Girl Stencils - Ornamental Collection - Ornamental Compass 

Black and gold paper is from the Irresistible India Mixed Media Happy Pack

Gwen's essentials - German Dresden - Borders Assorted Patterns

Chinese paper from Exotic Orient Deluxe Collage & Embellishment Pack


Sari Ribbon from Darn Good Yarn in Twisted Sister 

And this month Gwen's having a special on trim. Go wild. This stuff is gorgeous.