Showing posts with label printing. Show all posts

Wednesday, November 15, 2017

Reversible Boho Necklace - for the Artist Tribe


A reversible boho necklace to wear with more things than you would at first imagine. I've always wanted a statement piece like this one. What a surprise to me that it was easy and well within my reach to make myself. 


I know you can make one too. If you do, send me a note to let me know where you are sharing it so I can check you out. 


I knew before I started to assemble this necklace that I wanted a variety of paper with the images of Gwen's stencils. I print on reclaimed paper from gifts, packing and shopping. Most of this batch was printed on pharmacy bag paper.

I could have prepared them in a variety of ways - using a spray ink, pouncing paint upon the stencil or using artist marker. I chose the inexact and very flowy look of gelli plate printing. I simply love the process. So much loveliness to work with.


As you can see, I only use a tiny bit of it, so I have plenty left for other projects!!! 

Making the tag

These are the products needed to make the tag: 


The wooden tag - I purchased mine at Michael's.
A piece of gelli printed paper for each side. Using a separate print for each side makes it reversible. 
A piece of mirrored trim from Gwen's shop. 
A handprinted sliver of mulberry paper saved from other projects. This came in one of Gwen's paper packages. 
Gel medium to adhere the pieces.
Ranger liquid pearls - dimensional pearlescent paint -Orchid and Gold Pearl

Pink Side


1. Adhere the gelli print to the tag with gel medium.
2. Adhere the sliver of mulberry paper with gel medium.
3. Adhere the trim with gel medium.
4. Flip and do the other side. 
5. Coat the sides with the liquid pearls. Coat 3/4 of the way around. Let dry. Turn and coat the rest of the edge.

Turquoise Side


1. Adhere turquoise and white stenciled paper. 
2. Cut a piece of trim two flourishes long. Trim off the bottom section for this piece and put the flourishes aside for later. 
3. Using Ranger's Liquid Pearls add embellishment to the tag. 


Wooden Wheel Beads

I found these wooden wheels in a box I had filled fifteen years ago. Immediately using them in a necklace seemed imperative. I chose some of the gelli printed paper that used
Gwen's Ornamental Screen stencil. 

After priming them with gesso, they were painted with aqua acrylic paint. The stencils were trimmed to fit the wooden wheels. 


Adhere with gel medium. Cover with a layer of gel medium. Love these colors together.


The beads were flipped over and the glue gun was heated up. Sari yarn was glued to the indentation in the wheels.


They still looked a bit bare, so dots of Ranger Liquid Pearls were added.


Sari Yarn Wrapped Beads

1. Cover wooden bead with gesso and then paint the desired color. 


2. Thread a needle with like-colored thread. Take a stitch at the end of the sari yarn. Pull the needle through the bead. 


3. Pull sari yarn up to the opening and stitch through. Pull the needle back down through the hole. 


4. Pull the sari yarn back down to the bottom and take a stitch through. Continue this process until the bead is covered with sari thread. Leaving some space for the color to peek through adds vivacity. When the bead is covered to your liking take several stitches through the end of the sari yarn and trim. 


Eventually, you will use a jewelry wire to thread through the bead to attach to the chain. 


Spool beads


1. Cover spool with gesso. (Optional)
2. Cut the paper the width of the spool. 
3. Adhere paper to spool with gel medium. 
4. Add one flourish from the trim (left from a previous step) to each spool to cover the seam. 
5. Add embellishment using Ranger's Liquid Pearls - Gold  Pearl. 


Putting it all together


An old piece of sari fabric was the perfect color, so that became the hanger for the tag. A piece of sari yarn was used as the back of the neck.  The rest of the components were put together with traditional jewelry materials including some chunky chain pieces that had been looking for a purpose for many years. 


Materials used to make the necklace:
Gwen Lafleur Studios


Papers from Themed Collage Embellishment 

Gelli Arts
Gelli Printing Plate

Ranger
Ranger liquid pearls - dimensional pearlescent paint -Orchid and Gold Pearl

Golden
Regular Gel (Matte)

Hot Glue

Odds and ends from my stash (I'm so curious to hear what you find in your stash to use on a project like this!)


Credits:

Hair and makeup and portraits by the lovely Madeleine Ooka. You can find her blog, Because We Fall in Life at www.becausewefallinlife.blogspot.com and on instagram @becausewefall

All other photos by Lynda Shoup

Tuesday, August 8, 2017

Mono Print Origami Boxes


If you love mono-printing, and what's not to love, you may face a dilemma about what to do with all that luscious paper you made. You can use it in your art journals, on canvas, to make cards and so on. You know this, but perhaps, like me, you see more potential. 


Enter mono-prints as origami paper. Origami can be done will a variety of papers, not simply the ones you buy in packs. The two main things about the paper you use for origami are: 

1. It needs to be able to take a sharp crease. 
2. It needs to be able to hold up to a lot of creasing. 

While it is very popular to print on deli paper or tissue paper, these are not an ideal paper for origami. They just don't hold up to the folding. Something the weight of copy paper is actually best. 

While origami can be done with many different shapes of paper, the most common shape used is the square. To accomplish the square, I used my Fiskar's paper cutter. My paper with 5" wide, so I cut it to be a 5" square. 


I wanted to make the most of the color on the page, so I auditioned the best section I could get and shaved off each side to get the most interesting square. 


Here I have a stack of interesting squares. 


I am not going to give step by step directions for folding the box. I always use the style from Tomoko Fuse's book Origami Boxes. Full disclosure, I worked for Japan Publications Trading Company in the 1990s as a copy editor and translator. I have a fondness for this particular book because of the wonderful projects, but also because they actually paid me to fold all the boxes to see if the directions were understandable! 

If you are interested in the book, it is available through Amazon. A quick search of my state's library catalog shows that this book and many other of her books are available through interlibrary loan. Any book showing how to make origami boxes will work for you. Some of them use just two pieces - one each for top and bottom. Some require six or eight or even ten papers! 

Once I folded each of the six papers required for this style box, I sorted them into top and bottom. Find the best combination of colors. 


Connect the pieces. Here is what the pieces look like from above. 


This view shows how lovely the inside of the boxes is. 


Put the pieces together. This is a view of how the top and bottom coordinate. 


Notice how each side looks different. 


I like to rotate them to find the most pleasing combinations.


View from the bottom.


Finished box. It is lovely simply as decoration. I love to use these boxes as gift wrap. 


If you try this, I would love to see what you make. Leave a comment and a link so I can visit your creations. 

What do you do with your mono-prints? 

Wednesday, March 22, 2017

The Artist's Way


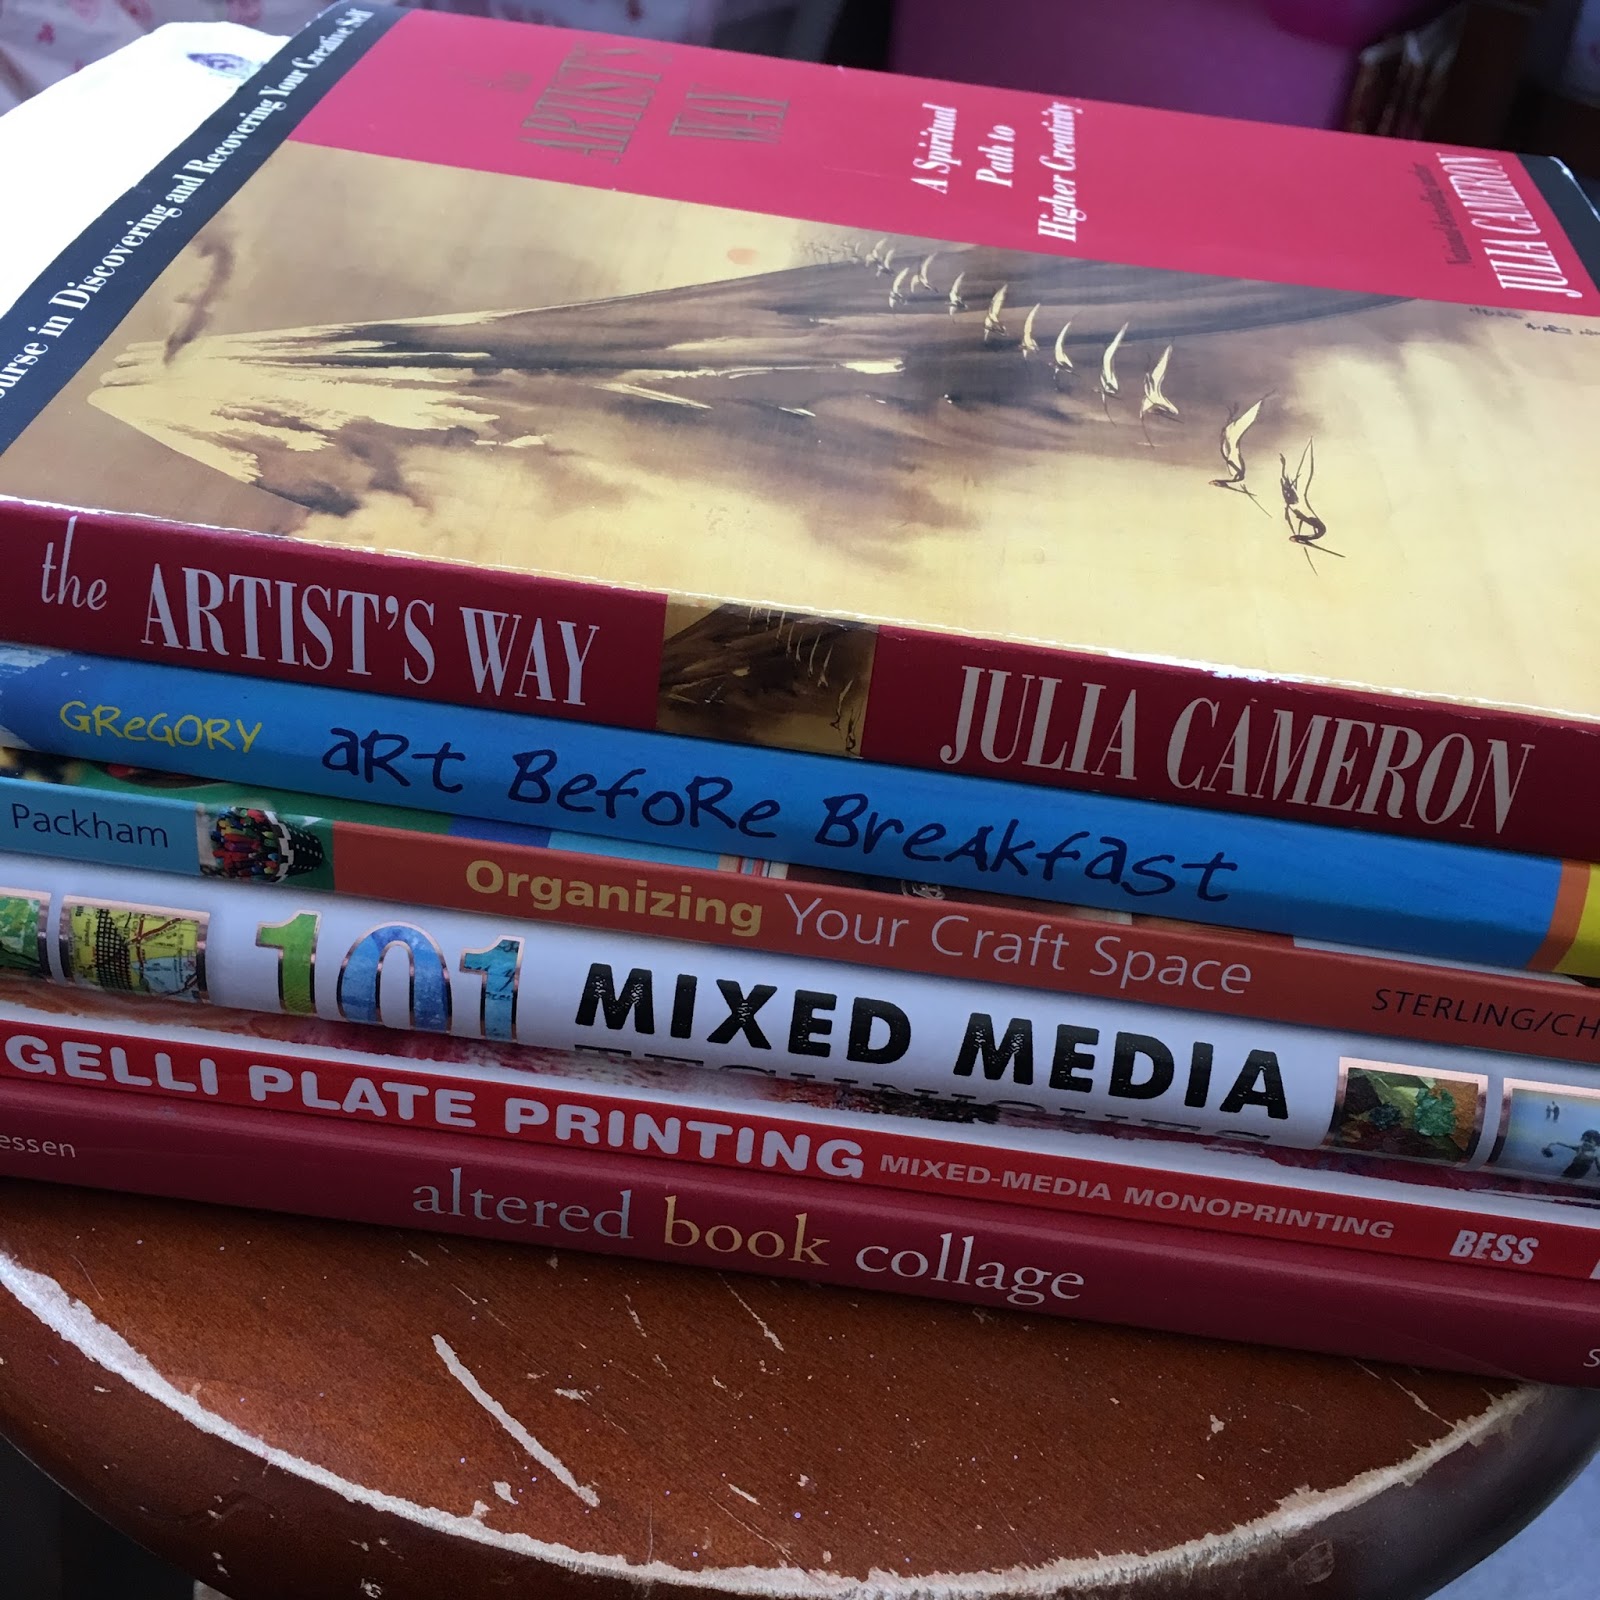
I've been hearing about The Artist's Way by Julia Cameron for a long time now. Several years ago my friend Cindi Huss told me about the book and about morning pages. I didn't read the book, but I got the gist and started doing them off and on. About a year ago, the book found me at a Barnes and Noble and jumped off the shelf. Literally. I took it home and it stayed on the very shelf I photographed since then. About six weeks ago I started doing morning pages every day and decided to read the book.

Thus started this journey. 

For the Artist Date portion of my assignments I have decided to set down some time each week with one of the books from the overcrowded shelf, find a skill and try it. So far this is leading to some fun creativity. I'm moving into different territory.


I started with the Gelli Plate Printing: Mixed-Media Monoprinting Without a Press by Joan Bess. Quite a lot of paint has been seen flinging about here. Intrigued by the Paper Cloth on page 90, I mixed up some glue, unearthed some muslin and got down to business. What a fun process! Several other techniques await the right tools to make them happen (where is that carpet tape when you need it?)


Friday, July 17, 2015

Artist's Retreat - July 2015

First meal of Artist's Retreat - on the shore at Plymouth, Massachusetts. Photograph altered with Brushstroke app. 
Artist’s Retreat. Doesn’t that sound romantic? Maybe expensive? Certainly illusive.

Well, at least that’s how I felt about it. Every year I’d talk to Cindi Huss, a dear friend who has moved far enough away that we don't see each other often. We’d say how we should run away for a weekend sometime and leave all our responsibilities behind us. Well, this year I called her up and said “Let’s have an artist’s retreat!” She was enthusiastic and so we started planning. Last week was the fruit of all those conversations.


Revel in these paint colors!

We had three full days together. Cindi had seen my art journaling work and was game to give it a go. Our plan was to do gelli printing, art journaling and gelli printing on silk scarves. Cindi also brought matching white moleskins in which we would record our retreat. I found some necklace findings which allow for a picture to be inserted. We would also have these as momentos of our time together.  Our other goals included food and laughter.

Gelli Printing

We took turns. Each of us printed a few and then handed the gelli plate to the other. We never washed the plate until we were done. This method allowed us to rif on each other’s work, gave us the challenge of using what was left on the plate to create a new print and resulted in some pretty amazing pulls in which we could see traces of each other in our prints. When finished we laid out Cindi’s prints to photograph them. Then we did the same with mine. It was amazing to see how even though we had the same materials with which to work, we made very different collections of prints. It was also really fun to see Cindi’s touch in the middle of my creations.

Cindi's gelli prints. 

My Prints. Notice how different the color scheme is. 
Art Journaling

Cindi made her journal by taking large paper, applying gesso, ripping it to size and sewing together. We actually applied gesso the first day so that we could use our pages as a place to blot excess paint from brayers, paintbrushes and fingers.

I suggested the added challenge of each of us using a gelli print the other made as the inspiration for the journal page. Even as I suggested it, I quaked in my boots. Cindi took up the challenge and off we sped. We each offered up prints that we could part with which added another level of structure vs. choice. 


(Left) Cindi's print. Red was going to be a challenge for me, but those shapes! Could be leaves. Could be paisley. (Right) My print. She was already seeing things in this print.

Working with these colors was definitely out of my comfort zone. We added background color, stamping, stencils, spray ink, collage and pen. I regret neglecting to introduce Cindi to the joys of bubble wrap printing.

You can see our pages. 

What do you know? I can use red.

The shapes were taken organically from the print. I stared at it until I could see the lines in the print.

The whole page felt organic to me. It didn't take much thinking. 

Working with Cindi was great. The message came easily in her presence. She is such a fountain of joy and compassion. 

Cindi's journal page. It was fun to see her expand her vision as she added layers. 


Gelli Printing on Silk Scarves

We had seen the tutorial on the Gelli Arts blog that shows using the round gelli plates to print of silk scarves. We both reacted very positively to that idea, so we forged ahead. One of Cindi’s many talents includes dyeing fabric. Go to her website or blog to read more about her work. She had some silk scarves and offered to bring them. 


After brushing on the paint I pressed a piece of lace into the paint. Here is the result. 

This piece of lace is brightly colored now from the number of times I used it as a pattern maker. 

Cindi and I took very different approaches to this project. I started out too rigid and lifeless in my thinking. I used the blocks as the rectangles they are, marking them by pressing a piece of lace into them. 


No limitations for Cindi! She did not conform to the shape of the plate. 

Cindi printed with wild abandon. Eventually I loosened up and added the circles – big and little. The circles were made with stamps I had made from styrofoam trays my vegetables came in. Cindi’s scarf was a wild garden full of vibrant flowers and leaves.

Taking the scarves off the freezer paper was awe-inspiring. We gasped when we saw how different the scarf look as it draped around my neck or on the table.

My scarf unveiled.

Cindi wearing the scarf on the way home. 

Cindi's scarf off the freezer paper. 


Moleskine Notebooks

A silly picture we took with the APP Snap Dash. The caption reads "You're a pig being carried to a luau."

We wrote in our notebooks. What we did. How we did things. Things we wanted to remember. Food we ate. Pieces of the work we did. Photographs of us being silly. Working in these books helped us to think about what we had created and to take it to the next level. They are wonderful reminders of these days spent together and of our friendship. I will cherish mine.

Necklaces

The pieces we gave to each other. (Left) from me (Right) from Cindi.

We each chose a gelli print to cut a piece out to put in our necklaces. We each wrote a message to the other on the piece of paper we gave. Then we put them together with a piece of our own and closed the latch. Lovely charms for us to wear and shine.


It was hard to let Cindi go when the time came. Yet instead of that old feeling that things were coming to a close, I had a strange feeling that something was beginning. Guess we’ll just have to do it again. Can’t wait.


Want to see more about Cindi? You can see some of her work at http://www.cindihuss.com or her blog Dancing Threads.