Wednesday, October 25, 2017

Kuchi Koo Take Two - Stenciled Bracelet - for the Artist Tribe


Kuchi Koo Take Two!

The Artist Tribe is featuring Kuchi Patches from Gwen Lafleur's shop. I've already featured one, a small round one, in a fiber art brooch. (Interested? Click here.)

Look at this beauty! The color. The design. The geometry. I was smitten, but couldn't decide what
to do with it. 


That is until the day I looked up from what I was doing and saw this. The color of the Strathmore Printmaking paper cover was a perfect match. I had been saving it because, well, it's good paper and I keep such things to reuse. Also on my desk that day, was an empty cardboard roll which had been relieved of its duct tape. 

I cut the paper half an inch wider than the cardboard roll. You may want to leave 3/4 of an inch to make putting it together a little easier. 


Using a ruler, mark a quarter inch from the edge on the back side. Then using a paper punch for making tiny holes pierce the paper every quarter inch along the line. 


Now for the fun! 


I chose Gwen's stencil Art Deco Borders Stencil because I felt it would echo the angles of the kuchi patch. I lined the stencil up with the edge of the paper and applied black acrylic paint. This was where I had to make some additional design decisions. The paper was very porous and so I did not get a clean transfer. What I got was a lot of bleed. No matter, there are ways to address this. 

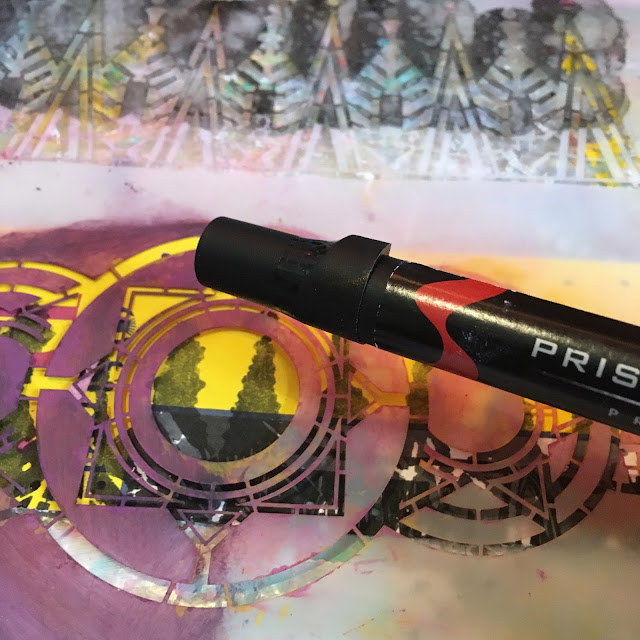
Next, I used the middle element and used a prismacolor marker that picked up some of the colors of the kuchi patch. 


The results looked like this. 


So far I was loving it but wanted more. Turning the paper over, I added the original stencil using black to the other side. I think you can see some of the bleed here. Next, I went in with gel pens in a contrasting color and went through the stencil again.


Here you can see the result of using the stencil in two different colors and styles and four colors of accent gel pen. 


Before attaching it to the cardboard, I checked the kuchi against the paper. When I was happy with the results I added a layer of gel medium to protect the paper. I cut a piece of felt for the interior of the circle, lined up the paper and the felt and sewed them in place using red embroidery floss using a blanket stitch. 


Remember the raffia I bought at the Bonzai supply store and used in my Welcome Wall Hanging? It was a perfect color to use on this project. Taking four strands, braid a long piece, tie off and sew to the edge of one side. Repeat for the other side. 


Here it is! I can't decide whether to trim back the raffia. What do you think? 


Top


Bottom

Products needed for this project:


Empty roll of Duct Tape
Cover from Strathmore paper or paper of your choice
Acrylic paint in colors that complement your Kuchi Patch
Gel pens 
Gel medium
Piece of felt
Embroidery floss
Raffia


Love those Kuchi Patches? There is still time to cash in on the sale. 


and Gwen's having a Birthday Sale! 
Check in on October 30 - 31. 


Wednesday, October 18, 2017

Font Choice in a Digital World


This is a repost from my neglected library blog Stacked in Our Favor edited slightly for this readership.

A member of a writing group I was in got me thinking about typeface and professional behavior. For a long time New Times Roman has been a default of style and professionalism. It is the default typeface in most word processing programs. It is the font considered to be the professional choice to use when submitting work that matters.

I have to question whether this is really in our best interests in a digital world. 

Years ago a favorite professor of mine stated that she would appreciate it if work submitted to her digitally used a non-serifed font. Her choice was Verdana. The reason? The non-serif font is easier to read from a computer screen. For someone who does a great deal of work reading online submissions, this is a critical issue. From that moment forward, I have used a non-serif font on my digital submissions when I deemed it appropriate. Over the years, I have found that it does, indeed, make a difference to me. That is why I have chosen to use Verdana as the typeface on my blogs. 


I also wonder about how the default affects children who are growing up online. Adults who are not aware, default to a serifed font. This is not as easy a transition as one might think for the emerging reader.  The letter “a” in particular, causes children distress. 

After thinking about these things I have changed my way of selecting font:

1.    For my own digital creations, I use a non-serifed font. You will find this on my blogs, in my course materials, and in many of the more personal submissions I make.

2.    For formal submissions, I follow the guidelines. If there are no guidelines, I usually submit in Times New Roman as that is considered the standard professional font.

3.    For elementary school students, I use a non-serifed simple font giving particular attention to the lower case “a”. This is for any computer generated materials including the materials children may be accessing digitally as well as the materials which I produce digitally to print and hand out.

4.    Love letters, I write by hand.

I’d love to hear what people have to say about font choice in a digital context. Have you thought about it? How do different fonts make you feel? Do you always go with the default or are you a font manipulator? Do you think that the default font will change as we are increasingly a digital society?

Wednesday, October 11, 2017

Kuchi Koo - Artist Tribe Challenge October 2017


One of the many fun things about being part of Gwen Lafleur's Artist Tribe is the monthly challenges. Gwen's shop is so jam-packed full of great stuff it's hard to choose what to work on. These challenges help me to focus. I'm liable to stop and chase shiny objects midway through a project, so this structure works well for me.

Well, it's not just great for me, but it's also great for people who have a bit of hesitation because they can't think of how to use a particular shiny item. Peruse the Tribe's offerings of the month and you will get inspiration and the itch to create. Like bonuses? (Who doesn't?) There's a discount coupon at the end of the post.

This month the challenge was to use her kuchis from Afganistan. Here is my project and some information about my process. I got so wrapped up in the process I forgot to take pictures at each step. 


Who wouldn't make the connection between this piece of silk that's been in my stash for near 10 years and this beautiful kuchi


This gold trim from the Irresistible India Happy Pack in Gwen's shop and I love the way it works with the gold thread.


Then there is this - beautiful sari yarn from Darn Good Yarn. 
The colors! So luscious! Knew that this sari yarn would have to be stitched around the edge of the kuchi. 


But before I used that great Twisted Sister sari yarn, I thought the green sari ribbon that was in my welcome pack would be a great background. A running stitch along the edge, a pulled to make a ruffle and roughly stitched to the back of the kuchi made for a strong base. 


Next, the Twisted Sister sari yarn was stitched into the green sari yarn along the edge of the kuchi. 

Later I found it disappeared into the fabric, so I ended up stitching it again to upper edge of the kuchi. It was much more visible this way. 


Next the gold trim was gathered and sewn to the green sari yarn.


Next I wrapped some of that Twisted Sister sari yarn around my hand and tacked it together with thread. By cutting the bottom I made tassels of sorts. 

Remember that silk fabric? I cut some and tied it in a knot at the end of each strand. Beads were added and the whole was stitched to the back of the kuchi. 


Cutting a strip of silk for one more round of ruffle made it very apparent that silk frays. A quick zigzag around the edge helped to stop the strands from flying away. Then the two edges were sewn together, drawn into a ruffle and sewn to the backside of the kuchi. 


Finally, a circle of felt was sewn to the back to cover all the stitching and errant threads and a pin backing was tacked in place. Viola! A pin to wear to cheer up dreary days. 

I hope I have tickled your fancy with my Kuchi-Koo. Find yourself thirsting for a kuchi? Well, my friend, you have come to the right place. Gwen is having a sale.